Live TV
Channels, movies & series playback
Complete guide for buyers and developers · Current release: v1.0.0
Welcome to the official documentation for Nova IPTV Player v1.0.0. This guide is for buyers and developers who want to customize the app, change its identity (name, icon, package), and build a release-ready version.
Disclaimer: This app is only a media player. Users must provide their own content.
Nova IPTV Player is built with Flutter from Google, so it runs on Android (phones and TV) and iOS from a single codebase. The app supports:
Channels, movies & series playback
Optimized for mobile and Android TV
Full playlist protocol support
Replay, VOD and Series ready
Better Player & VLC Player
flutter pub get then flutter run.Everything you need to run, edit, and build the project.
| Requirement | Version | Notes |
|---|---|---|
| Flutter SDK | 3.7.0 or newer (< 4.0.0) | Defined in pubspec.yaml |
| Dart | Bundled with Flutter | No separate install |
| Git | Recent version | For clone and updates |
Install Flutter: Download from flutter.dev and add flutter/bin to PATH. Verify with:
flutter doctor -v| Requirement | Notes |
|---|---|
| Android Studio or VS Code + Flutter | To edit and run the app |
| Android SDK | compileSdk 36, minSdk 24, targetSdk 36 |
| JDK 11+ | For Android build (Java 11 in this project) |
The project supports Android TV (Leanback).
| Requirement | Notes |
|---|---|
| macOS | Required to build iOS |
| Xcode | Latest from App Store |
| CocoaPods | With Xcode or sudo gem install cocoapods |
| Apple Developer Account | To upload to App Store |
cd ios && pod install && cd ..
flutter runflutter doctor -v
flutter pub get
flutter run
flutter run -d <device_id>| Path | Description |
|---|---|
lib/ | App code (Dart) |
lib/helpers/ | Constants, translations, helpers |
android/ | Android config |
ios/ | iOS config |
assets/images/ | Images and app icon |
pubspec.yaml | Project name, version, packages |
This source package is delivered clean (without build/cache folders) to reduce file size.
On a new machine, run these commands once from project root:
flutter doctor
flutter pub get
flutter run
flutter doctor: checks Flutter/SDK tools on the buyer machine.flutter pub get: downloads dependencies from pubspec.yaml.flutter run: recreates generated files and launches the app.Excluded folders like build, .dart_tool, Pods, and .gradle do not contain app features. They are regenerated automatically.
The package name identifies the app uniquely on the store and device. Change it in all of the following places.
File: android/app/build.gradle.kts
android {
    namespace = "com.mybrand.iptv"   // was: nova.iptv.player

    defaultConfig {
        applicationId = "com.mybrand.iptv"   // was: nova.iptv.player
        // ...
    }
}MainActivity.kt under a path like nova/iptv/player/: create a new path like com/mybrand/iptv/, move the file, and update the first line to package com.mybrand.iptv.From Xcode: Open ios/Runner.xcworkspace → Runner → Signing & Capabilities → change Bundle Identifier from nova.iptv.player to e.g. com.mybrand.iptv.
Or edit manually: In ios/Runner.xcodeproj/project.pbxproj search for PRODUCT_BUNDLE_IDENTIFIER = nova.iptv.player; and replace with the new identifier in all occurrences (Debug, Release, Profile).
flutter clean
flutter pub get
flutter run
Uninstall the old app from the device if it had the same Application ID / Bundle ID, then install again.
Android: File android/app/src/main/res/values/strings.xml — change <string name="app_name">Nova IPTV Player</string> to your branded name if needed. The default in the project is Nova IPTV Player.
iOS: File ios/Runner/Info.plist — find CFBundleDisplayName and change the value (e.g. to Nova IPTV Player).
Inside the app: In lib/helpers/constants.dart change const String kAppName = "Nova IPTV Player"; and in lib/helpers/app_translations.dart search for 'app_name': 'Nova IPTV Player' and update for the languages you use.
The app uses flutter_launcher_icons. Place your image in the project (e.g. assets/images/logo app.png) at 1024×1024 PNG.
In pubspec.yaml ensure:
flutter_launcher_icons:
  android: true
  ios: true
  image_path: "assets/images/logo app.png"
  remove_alpha_ios: true
Then run:
flutter pub get
dart run flutter_launcher_icons
Then flutter clean && flutter pub get && flutter run.
| What | File |
|---|---|
| App name (Android) | android/app/src/main/res/values/strings.xml |
| App name (iOS) | ios/Runner/Info.plist → CFBundleDisplayName |
| In-app name | lib/helpers/constants.dart and app_translations.dart |
| Icon source | pubspec.yaml → flutter_launcher_icons.image_path |
The app uses Google Mobile Ads (AdMob). Before publishing to Google Play or the App Store, the buyer must replace the seller’s AdMob identifiers with their own from AdMob. There are two kinds of values:
ca-app-pub-XXXXXXXXXXXXXXXX~YYYYYYYYYY) — one per platform (Android / iOS). Declared in native config so the SDK initializes correctly.ca-app-pub-XXXXXXXXXXXXXXXX/ZZZZZZZZZZ) — one per placement (e.g. banner, interstitial). Used when loading ads in the Flutter code (or overridden from your control panel response).File: android/app/src/main/AndroidManifest.xml
Inside <application>, find com.google.android.gms.ads.APPLICATION_ID and set android:value to your Android App ID from AdMob (starts with ca-app-pub- and contains ~).
<meta-data
    android:name="com.google.android.gms.ads.APPLICATION_ID"
android:value="ca-app-pub-YOUR_PUBLISHER_ID~YOUR_ANDROID_APP_ID"/>File: ios/Runner/Info.plist
Set GADApplicationIdentifier to your iOS App ID from AdMob (same ca-app-pub-...~... pattern).
<key>GADApplicationIdentifier</key>
<string>ca-app-pub-YOUR_PUBLISHER_ID~YOUR_IOS_APP_ID</string>File: lib/repository/locale/admob.dart
This file defines the fallback ad unit IDs when the control panel does not send overrides. Replace the default strings with your AdMob Banner and Interstitial unit IDs for Android and iOS (each is a ca-app-pub-.../... string without ~).
The app may also read these keys from local storage when your panel returns them on activation (see Control panel requirements): banner_ad_unit_android, banner_ad_unit_ios, interstitial_ad_unit_android, interstitial_ad_unit_ios. If present, they override the defaults in code until cleared.
| Step | Where |
|---|---|
| Create apps & ad units in AdMob | AdMob console → Apps → Ad units |
| Android App ID | AndroidManifest.xml → APPLICATION_ID |
| iOS App ID | Info.plist → GADApplicationIdentifier |
| Banner / interstitial IDs | lib/repository/locale/admob.dart (and/or panel JSON fields) |
| Rebuild | flutter clean then flutter pub get then release build |
Do not ship with another seller’s ca-app-pub- IDs — use your own AdMob account so revenue and policy compliance are yours.
The app uses two external APIs for movie/TV ratings (TMDB) and subtitle search inside the video player (OpenSubtitles). You manage both keys from the admin control panel — no app rebuild is required when you change them.
The panel stores credentials in the settings database table (tmdb_api_key, opensubtitles_api_key, opensubtitles_username, opensubtitles_password) and sends them to the app on every check-activation response.
Used for: TMDB ratings on movie/series detail pages when the IPTV server has no rating, and resolving tmdb_id when searching subtitles.
Api-Key header).Used for: the Search subtitles feature in the player (Movies & Series → Audio & Subtitles).
On each activation check (POST /api/check-activation.php), the panel JSON includes:
{
  ...
  "tmdb_api_key": "your_tmdb_key",
  "opensubtitles_api_key": "your_opensubtitles_key",
  "opensubtitles_username": "your_username",
  "opensubtitles_password": "your_password"
}
The Flutter app saves them in local storage (GetStorage) and uses them at runtime. Keys are read from:
lib/repository/locale/panel_api_keys.dart
Fallback constants in lib/core/tmdb_config.dart and lib/core/opensubtitles_config.dart are empty by default — configure keys in the panel.
| Key | Panel field | Feature |
|---|---|---|
| TMDB | settings.tmdb_api_key | Ratings, TMDB ID lookup |
| OpenSubtitles API key | settings.opensubtitles_api_key | Subtitle search |
| OpenSubtitles user | settings.opensubtitles_username + password | Subtitle download (JWT) |
Nova IPTV Player can work in two ways: with a control panel (activation, playlist from panel, optional ads/blocking) or standalone (user enters server URL + username + password manually). To use your own panel, you must point the app to your panel URL and ensure your panel implements the required API.
The app talks to a control panel over HTTPS. Configure your panel URL in one place. Open:
lib/core/config.dart
Change the following to your panel domain:
const String kActivationPanelBaseUrl = 'https://panel.yourdomain.com/';Replace with your actual panel host (e.g. https://panel.yourdomain.com/). Use HTTPS and keep the trailing slash. The app will send requests to your panel API endpoints from this base URL (e.g. /api/check-activation.php).
POST /api/check-activation.php). The panel responds with activation status and, if active, a domain (playlist URL or Xtream panel URL).domain URL, the app can auto-fill the server URL. If the URL includes ?username=...&password=..., the app can auto-login with that user.player_api.php or M3U), not from your control panel. The panel only provides activation and the initial playlist/domain.check-activation with device ID.status (e.g. active/inactive/expired) and optionally domain, username, password, app_name, ads settings, etc.domain is set, the app uses that URL (and credentials if present) to connect to the IPTV server (player_api.php or M3U).activate-device endpoint) or enter server URL + username + password manually.For full request/response formats and all endpoints, see Control panel requirements below.
Your control panel must be hosted over HTTPS and expose the following API endpoints. All are POST (unless noted), with JSON body and JSON response.
Endpoint: POST /api/check-activation.php
Request body:
{"device_id": "<device_id>"}device_id is a unique device identifier (Android ID or iOS vendor ID).
Response (200 OK, JSON):
{
  "activated": true,
  "message": "",
  "expiry_date": "2026-12-31",
  "username": "optional_xtream_user",
  "domain": "https://iptv-server.com or https://iptv-server.com/playlist?username=u&password=p",
  "auto_activation_enabled": true,
  "ads_enabled": true,
  "banner_home_only": true,
  "banner_ad_unit_android": "ca-app-pub-xxx",
  "banner_ad_unit_ios": "ca-app-pub-xxx",
  "interstitial_ad_unit_android": "ca-app-pub-xxx",
  "interstitial_ad_unit_ios": "ca-app-pub-xxx",
  "app_name": "Nova IPTV Player",
  "block_vpn": false,
  "piracy_detection_enabled": false,
  "piracy_packages": ["com.screenrecorder.app", "com.videodownloader.app"],
  "piracy_message": "Please remove the app: {app_name}",
  "tmdb_api_key": "your_tmdb_api_key",
  "opensubtitles_api_key": "your_opensubtitles_api_key",
  "opensubtitles_username": "your_username",
  "opensubtitles_password": "your_password"
}
When activated is true, the app expects status in the format used in the app (e.g. “نشط” / “Active”); the app maps from activated: true to active status. domain is required for the app to load the playlist: either the Xtream panel base URL or a full M3U/playlist URL; optionally append ?username=...&password=... for auto-login. All other fields are optional.
Endpoint: POST /api/activate-device.php
Request body: {"device_id": "<device_id>"}
Response: {"success": true, "already_active": false, "expiry_date": "...", "message": "..."}
Used when the user requests activation (e.g. after entering a code or from the panel).
Endpoint: POST /api/heartbeat.php
Request body: {"device_id": "<device_id>"}
Called periodically when the user is active. Optional; used to track online devices.
Endpoint: POST /api/save-playlist.php
Request body: {"device_id": "<device_id>", "playlist_url": "<url>"}
Response: {"success": true}
Stores the user’s playlist/domain for that device so the panel can return it on next check-activation.
Endpoint: POST /api/delete-playlist.php
Request body: {"device_id": "<device_id>"}
Response: {"success": true}
Clears the stored playlist for that device (e.g. on logout).
The streaming data (live, VOD, series) is not served by your control panel. It is served by the user’s IPTV server. Your panel only returns the domain (and optionally credentials) that point to:
https://iptv.yourdomain.com), where the app will call GET {domain}/player_api.php?username=...&password=... and actions like get_live_categories, get_live_streams, get_vod_streams, get_series, get_vod_info, get_series_info, get_short_epg.The Xtream server must respond to player_api.php with no action (or with user info) and return user_info (with username, password, status: "Active") and server_info (with server_url or equivalent). This is standard Xtream Codes API behavior.
| Endpoint | Purpose |
|---|---|
POST /api/check-activation.php | Return activation status and domain (playlist/XTREAM URL) for the device |
POST /api/activate-device.php | Activate a device (e.g. after payment or code) |
POST /api/heartbeat.php | Optional heartbeat to track active devices |
POST /api/save-playlist.php | Save playlist/domain for the device |
POST /api/delete-playlist.php | Clear saved playlist for the device |
You can use the included admin panel in this source package or your own backend implementation, as long as the required endpoints are available over HTTPS.
Follow the steps below to install and configure the PHP Admin Panel on your hosting server. No advanced PHP knowledge is required.
admin panel folder.public_html/ or inside a subfolder such as public_html/admin/.
admin panel/config/database.php
https://panel.yourdomain.com/admin/
adminadmin123456
lib/core/config.dart
kActivationPanelBaseUrl
flutter clean
flutter pub get
After completing the Admin Panel Setup, use this guide to manage your IPTV platform from the included admin panel. Each page below is designed for day-to-day administration.
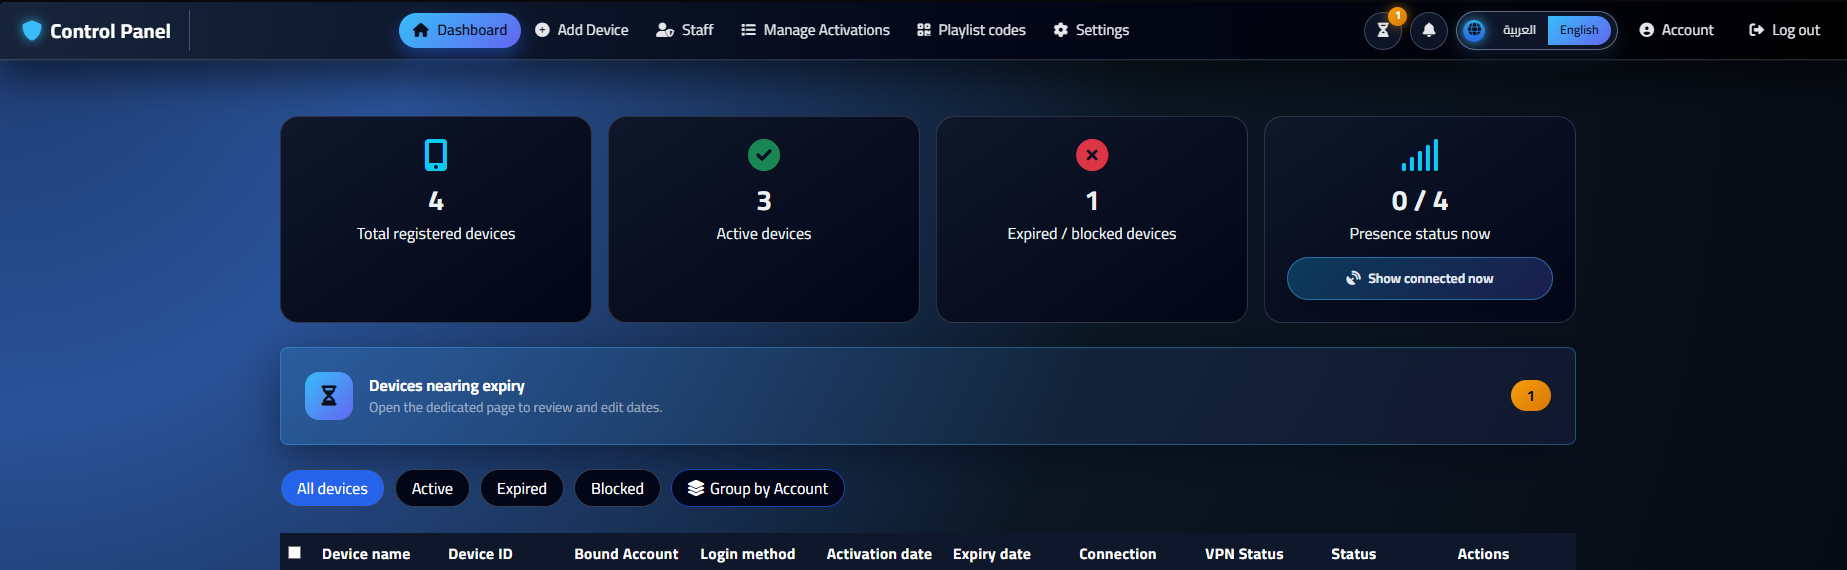
The Dashboard provides a complete overview of your IPTV platform at a glance. Monitor key metrics, recent activity, and system health from one central page.
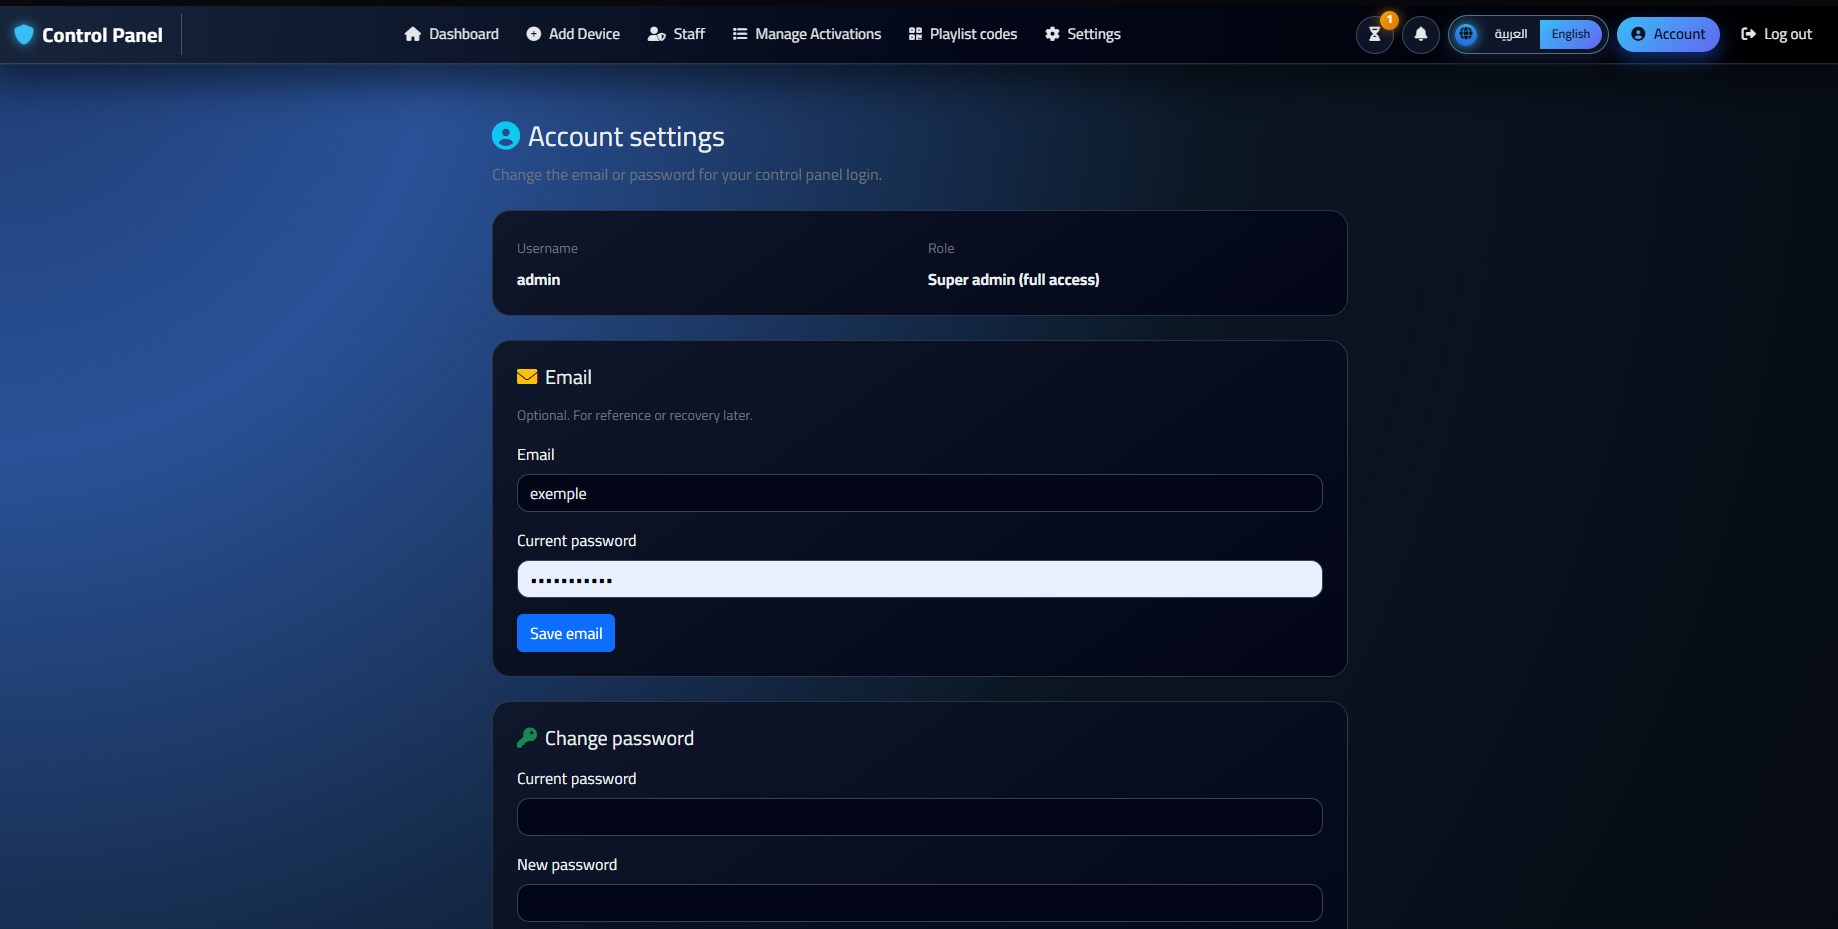
Administrators can create and manage administrator accounts, control access levels, and keep the panel secure.
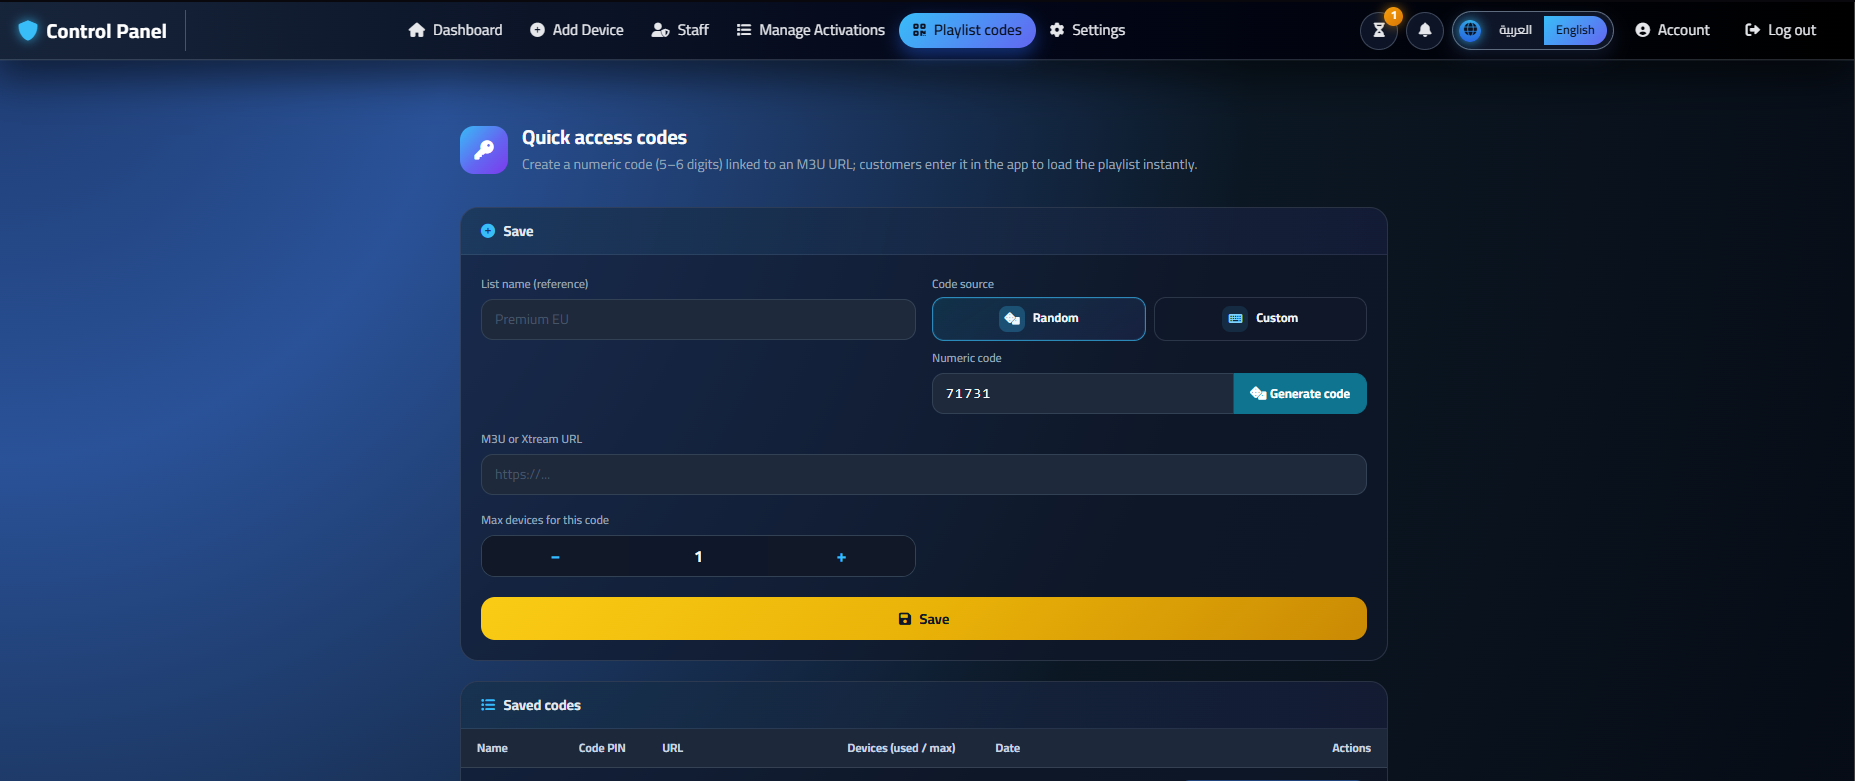
Create and manage playlist activation codes for your customers. Assign M3U or Xtream playlists, set device limits, and configure expiration dates.
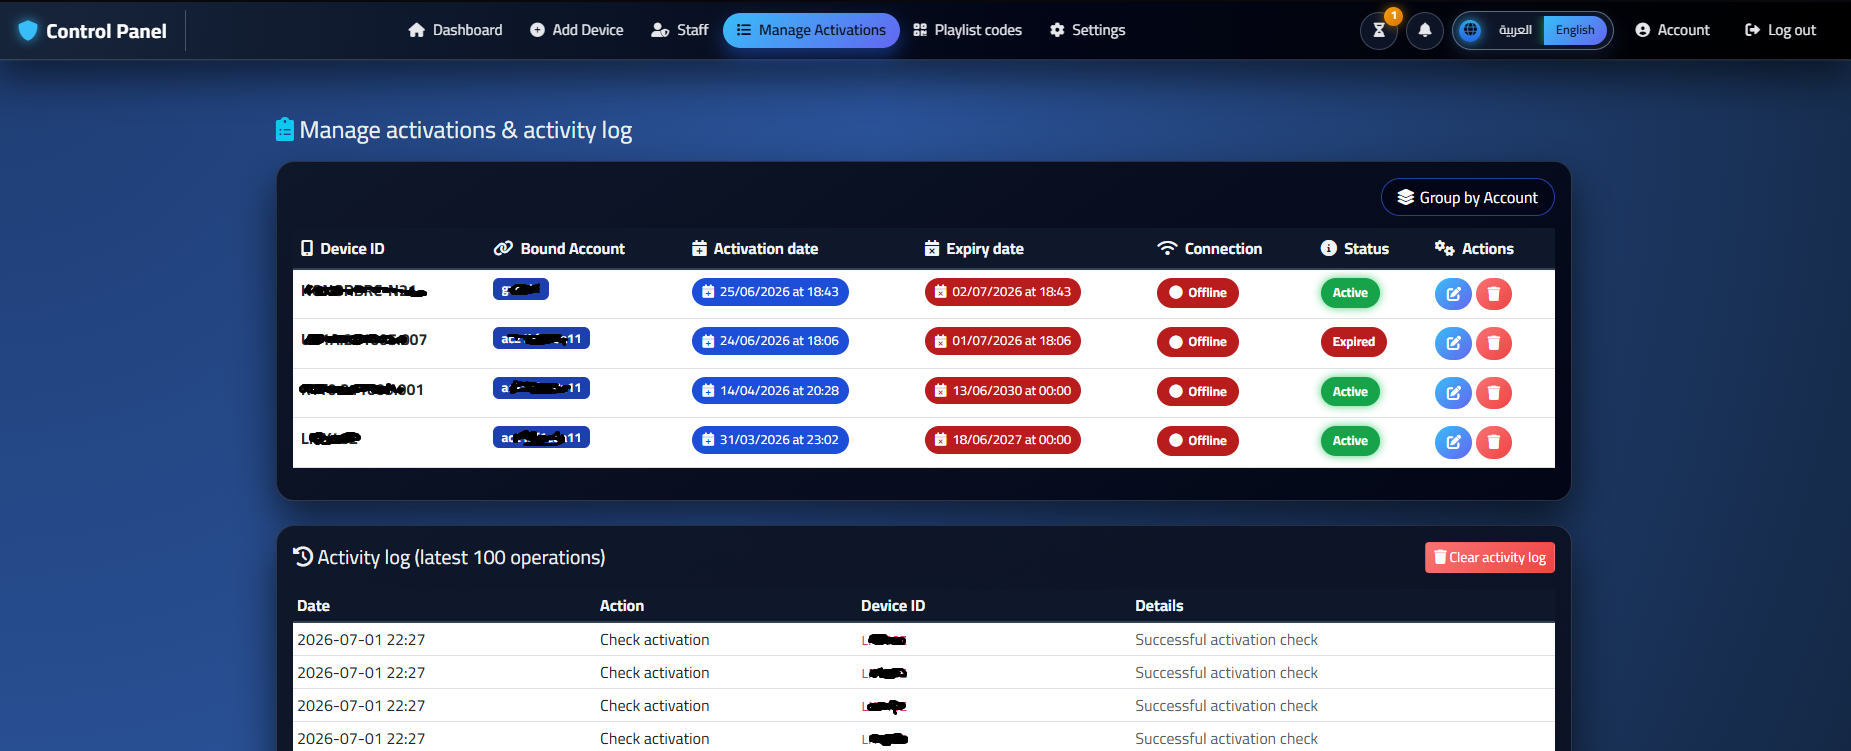
View and manage all activated devices. Search activations, monitor device status, and track expiration dates.
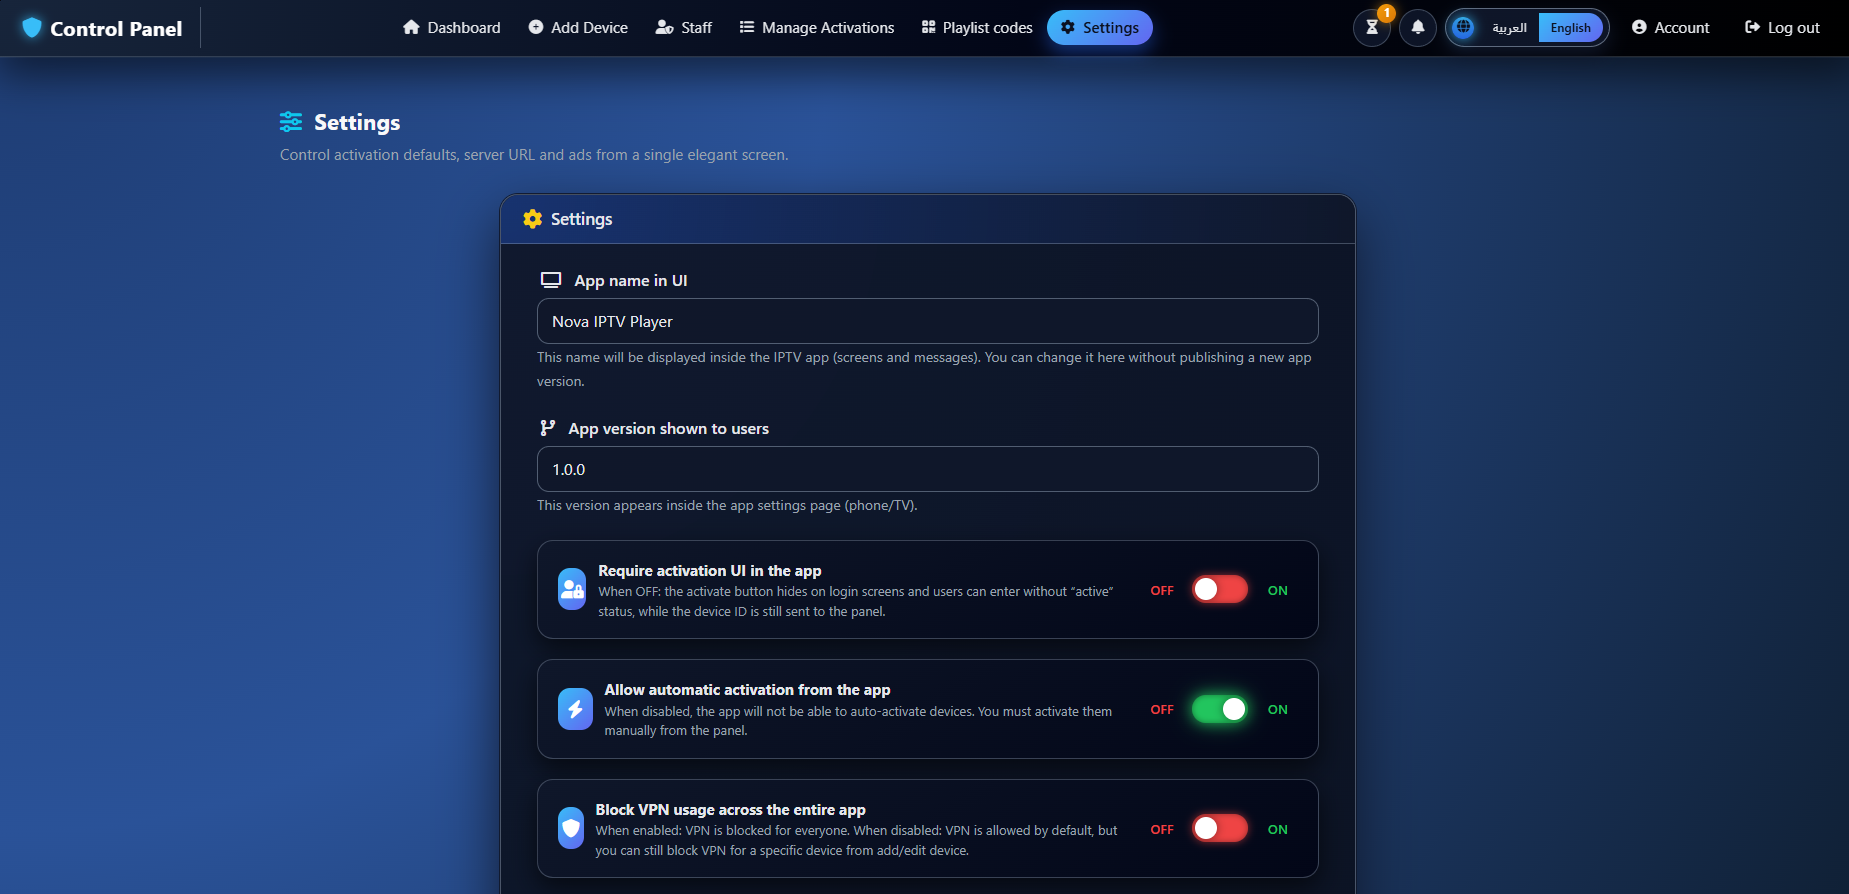
Configure application behavior, security options, API settings, and system preferences from a single settings page.
Before delivering to clients or publishing, confirm all items below.
| Item | Status Check |
|---|---|
| Panel URL | App points to your domain in kActivationPanelBaseUrl |
| HTTPS | Panel endpoints open with valid SSL certificate |
| Admin security | Default password changed; roles reviewed |
| App identity | Package name, app name, and icon updated |
| AdMob | Your AdMob App IDs in AndroidManifest.xml + Info.plist; your ad units in admob.dart (see AdMob) |
| API keys | TMDB & OpenSubtitles keys set in panel Settings (see API keys) |
| Settings links | support_contact_url and purchase_url configured |
| Activation test | One test device can activate and receive domain |
| Playback test | Live/VOD/Series load correctly from IPTV source |
| Piracy detection | Blacklist configured in admin Settings if needed (see Piracy Detection) |
| Release signing | Production keystore/certificates configured (not debug signing) |
| Build output | Final APK/AAB (and IPA if needed) generated successfully |
Nova IPTV Player includes a piracy detection feature that helps protect your streams from screen recording, video downloading, and link-leaking apps. It also works with the license activation server to validate the app package name and reduce unauthorized clones or modified APKs.
When enabled from the admin panel, the app scans the device for installed applications whose package names appear on your blacklist. If a blocked app is found, the user cannot pass the login screen and sees a clear message naming the app that must be removed.
This is useful for blocking tools that can record the screen, capture streams, or leak playlist links to other users.
com.screenrecorder.app).POST /api/check-activation.php, the panel returns piracy_detection_enabled, piracy_packages, and piracy_message in the JSON response.{app_name} in your custom message is replaced with the detected application name.Open Admin Panel → Settings → Content piracy detection and follow these steps:
com.screenrecorder.app
com.videodownloader.app
com.linkleak.tool
To find a package name: on Android, open the app info page in system settings, or use adb shell pm list packages while testing on a device.
Optionally customize the user message, for example: Please remove the app: {app_name}
Click Save. The new list is sent to all devices on the next activation check.
Edit the same textarea in Settings, delete the line you no longer want to block, and save. Removed package names stop blocking immediately on the next activation check.
To disable the feature entirely, turn off Enable piracy / link-leak apps detection and save.
Each buyer should publish the app under a unique package name (see Change Package Name). The Envato license check (see License) sends your app’s package_name to the activation server on launch.
The server registers the package name together with your purchase code and panel URL. If someone repackages the app under a different package name without a valid license, the app will not pass license verification.
Release builds should always be signed with your own production keystore (see Build & Release). Combined with license verification and package-name registration, this reduces the risk of redistributed or tampered APKs being used with your panel.
Do not share your keystore file or key.properties credentials. Keep one official package name per published brand.
On every app launch, lib/services/seller_license_service.dart reads the installed app’s package name (for example, nova.iptv.player or your custom ID) and sends it to the license API together with:
purchase_code — your CodeCanyon purchase codeenvato_username — your Envato usernamebase_url — your activation panel host (from kActivationPanelBaseUrl)package_name — the app’s bundle / application IDThe server verifies the Envato license and associates the package name with your purchase. If verification fails, the app shows the license error screen and does not continue.
Your control panel separately returns the piracy blacklist through check-activation.php so you can manage blocked apps without rebuilding the Flutter project.
{app_name} so users know what to uninstall.To activate your source version inside the app, you only need to fill in your licensing details in one place inside the project.
Open this file in the project:
lib/services/seller_license_service.dart
const String envatoUsername = '...';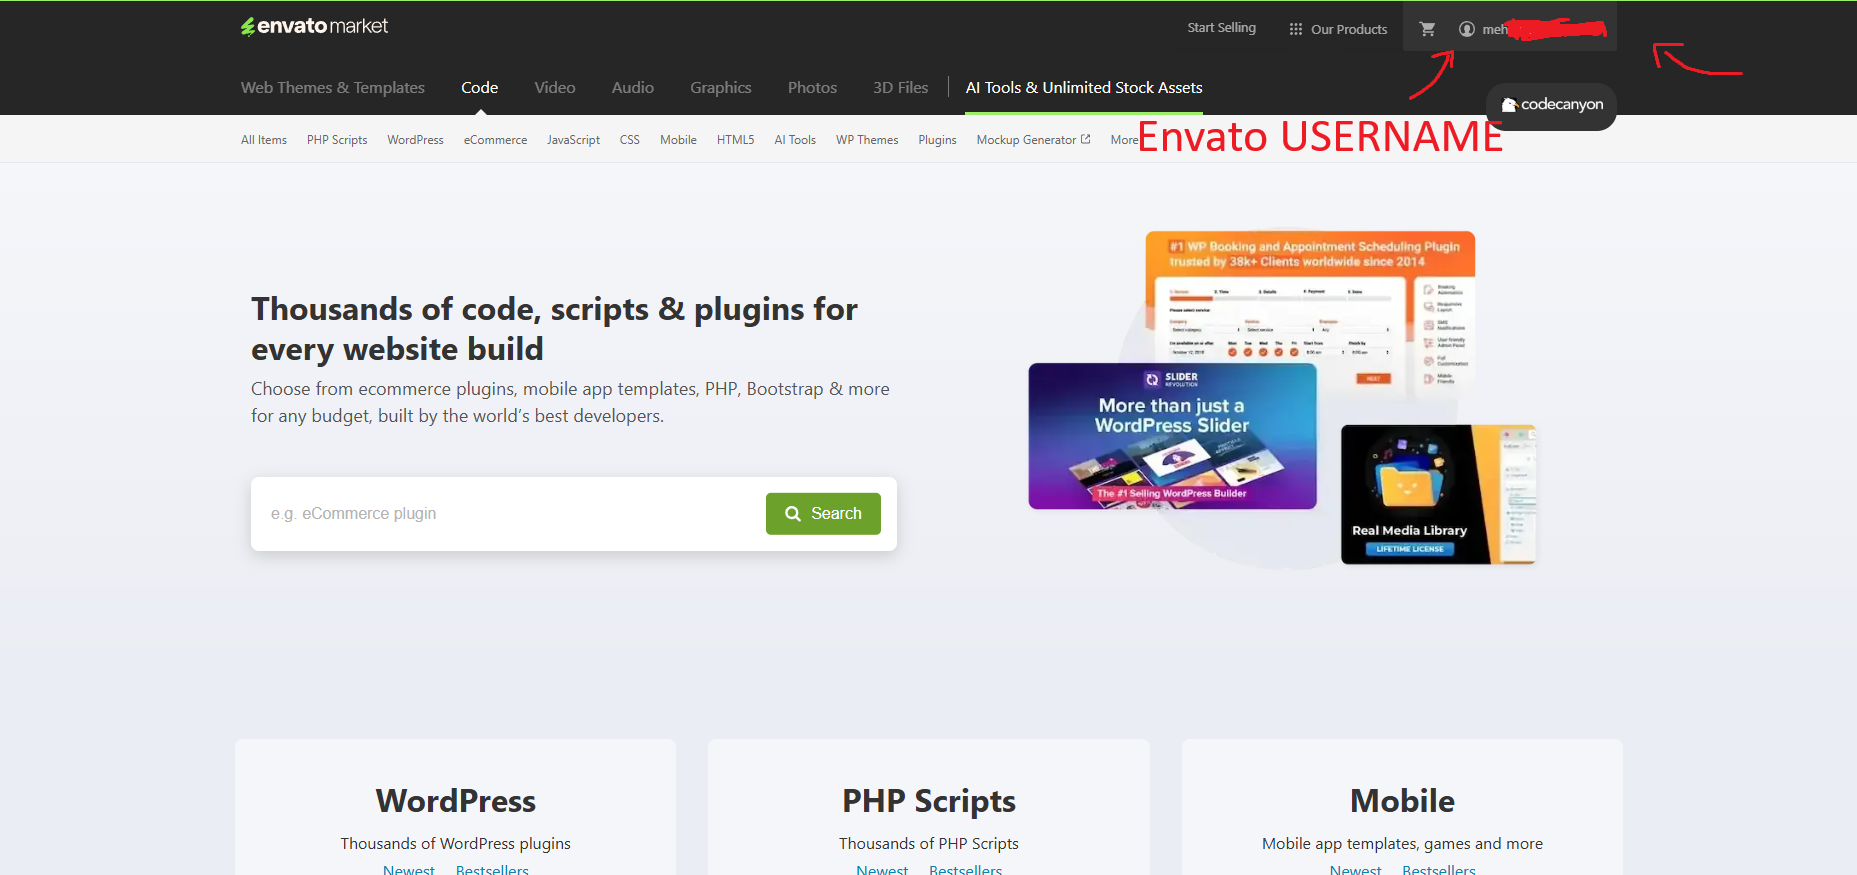
const String purchaseCode = '...';If you don’t know where to find your Purchase Code in Envato: Where Is My Purchase Code?
لتفعيل نسخة السورس داخل التطبيق، تحتاج فقط إلى تعبئة بيانات الترخيص في مكان واحد داخل المشروع.
افتح الملف التالي داخل المشروع:
lib/services/seller_license_service.dart
const String envatoUsername = '...';
const String purchaseCode = '...';إذا لم تكن متأكدًا أين تجد Purchase Code في Envato: Where Is My Purchase Code?
Common issues and solutions when deploying the admin panel or building the Flutter application. Start with the Flutter SDK section if the project fails during flutter pub get or flutter build.
Use this checklist when setup or build fails on a new machine. Always run commands from the project root (the folder that contains pubspec.yaml).
Problem: flutter run or build fails and flutter doctor shows red/yellow warnings.
Android SDK, cmdline-tools, licenses, Xcode, or CocoaPods are not installed or not accepted.
Solutionflutter doctor -vflutter doctor --android-licensessudo xcode-select --switch /Applications/Xcode.app and pod install inside ios/.Problem: pub get failed or messages like requires Flutter SDK version >= x.x.x / version solving failed.
Installed Flutter is older (or incompatible) with the SDK constraint in pubspec.yaml (this project needs Flutter 3.7.0+ and < 4.0.0).
flutter --version
flutter channel stable
flutter upgrade
flutter clean
flutter pub get
If it still fails, delete pubspec.lock and .dart_tool/, then run flutter pub get again. Prefer the stable channel.
Problem: Random compile errors after changing packages, icons, or package name.
CauseOld build/, Gradle, or Dart tool cache.
flutter clean
flutter pub get
flutter run
Optional deep clean (close IDE first): delete build/, .dart_tool/, and on Android also android/.gradle/, then run flutter pub get.
Problem: Messages such as Gradle build failed, Unsupported class file major version, or JDK / Java toolchain errors.
CauseWrong JDK for this project, or Gradle cache corruption. This project expects JDK 11+ (Java 11 used for Android builds).
SolutionJAVA_HOME to it.cd android
./gradlew clean
cd ..
flutter clean
flutter pub get
flutter build apkOn Windows use gradlew.bat clean instead of ./gradlew clean.
Problem: Failed to install the following Android SDK packages, missing platforms, or license not accepted.
CauseAndroid SDK Platform / Build-Tools not installed for the versions used by the project (compileSdk / targetSdk 36, minSdk 24).
Solutionflutter doctor --android-licenses and accept all.ANDROID_HOME / ANDROID_SDK_ROOT points to your SDK folder.Problem: Build fails after changing the application ID, or package does not match / MainActivity not found.
CauseIncomplete package rename: applicationId, namespace, Kotlin package path, or iOS Bundle ID out of sync.
Follow Change Package Name completely, then:
flutter clean
flutter pub get
flutter runProblem: flutter build appbundle or release APK fails with signing / keystore errors.
Missing key.properties, wrong paths, or keystore password mismatch.
Configure signing as described in Build & Release. For a quick unsigned debug test use flutter run or flutter build apk --debug.
Problem: pod install fails, or Xcode reports missing modules / signing.
CauseCocoaPods out of date, outdated Pods/, or missing Apple Team / Bundle Identifier.
sudo gem install cocoapods
cd ios
pod repo update
pod install
cd ..
flutter clean
flutter pub get
flutter build ios
Open ios/Runner.xcworkspace (not .xcodeproj), set Signing & Team, then build again.
Problem: Errors from media plugins (e.g. Better Player / VLC), ads, or other native Android/iOS plugins.
CauseIncomplete pub get, wrong Flutter version, or minSdk too low on a custom change.
minSdk below 24.If you are unsure which error applies, run this full recovery sequence once:
flutter channel stable
flutter upgrade
flutter doctor -v
flutter doctor --android-licenses
flutter clean
flutter pub get
flutter runProblem: The admin panel cannot connect to the database.
CauseIncorrect database credentials.
SolutionVerify database host, database name, username, and password in admin panel/config/database.php.
Problem: The app cannot communicate with the control panel API.
CauseIncorrect API URL or HTTPS is not configured.
SolutionVerify the API URL in lib/core/config.dart. Enable HTTPS on your domain. Use PHP 8.1 or later.
Problem: Device activation fails in the app.
CauseInvalid activation code or device limit reached.
SolutionVerify the activation code in the admin panel. Check the internet connection on the device. Confirm the device limit has not been exceeded for that code.
Problem: The admin panel returns permission errors or cannot write files.
CauseIncorrect folder permissions.
SolutionVerify file and folder permissions on the server and ensure PHP has read/write access to the admin panel directories.
Problem: The admin panel fails to load, returns errors, or API endpoints do not respond correctly.
CauseRequired PHP extensions are disabled on the server. Missing extensions may prevent the Admin Panel from working correctly.
SolutionEnsure the following PHP extensions are enabled on your hosting (PHP 8.1 or later recommended):
Contact your hosting provider or enable them in your PHP configuration (php.ini) if any extension is missing.
If you encounter memory or timeout errors during installation or large playlist imports, adjust your PHP configuration:
memory_limit = 256M (or higher)
max_execution_time = 300
max_input_time = 300post_max_size = 64M
post_max_size = 64M
upload_max_filesize = 64M
Problem: The Admin Panel displays a 500 Internal Server Error.
CauseUnsupported PHP version, missing extensions, or server configuration issues.
SolutionProblem: The application cannot connect to the API over HTTPS.
CauseInvalid or expired SSL certificate.
SolutionHTTP status codes returned by the admin panel API or your hosting server. Each card below lists the problem, typical cause, and recommended fix.
Problem: The API rejects the request because authentication is missing or invalid.
CauseWrong admin credentials, expired session, or protected endpoint called without authorization.
SolutionLog in to the admin panel again. For API calls from the app, confirm the endpoint is public (activation routes do not require admin login). Check server auth rules (for example, .htaccess or HTTP Basic Auth) that may block requests.
Problem: The server understood the request but refuses to allow it.
CauseFile permissions, mod_security rules, IP blocking, or WAF (Web Application Firewall) restrictions.
SolutionVerify folder permissions on admin panel/api/. Ask your host to whitelist your domain or disable false-positive firewall rules. Ensure PHP can execute files in the API directory.
Problem: The requested API URL does not exist on the server.
CauseIncorrect kActivationPanelBaseUrl, missing uploaded files, or wrong subfolder path.
Confirm the panel files are uploaded completely. Test https://panel.yourdomain.com/api/check-activation.php in a browser or API client. Match the base URL in lib/core/config.dart exactly (HTTPS, with trailing slash).
Problem: The HTTP method used is not supported for that endpoint.
CauseActivation endpoints expect POST with a JSON body. A GET request or wrong method triggers 405.
SolutionEnsure the app and any custom integrations send POST to endpoints such as /api/check-activation.php. Do not call these URLs from a browser address bar (which uses GET).
Problem: The server did not receive a complete request in time.
CauseSlow hosting, high server load, or unstable network on the device.
SolutionRetry on a stable connection. Upgrade hosting or increase PHP / web server timeout limits. Check that MySQL is running and responsive.
Problem: The server received the request but the data format is invalid.
CauseMissing device_id, malformed JSON, or empty required fields.
Send valid JSON, for example {"device_id": "your_device_id"}. Ensure Content-Type: application/json is set. Check API logs for validation errors.
Problem: Too many requests were sent in a short period.
CauseRate limiting on the host, CDN, or security plugin.
SolutionWait and retry. Reduce rapid repeated calls during testing. Contact your host to adjust rate limits for your panel domain.
Problem: The server encountered an unexpected error while processing the request.
CausePHP errors, database connection failure, or missing PHP extensions.
SolutionCheck admin panel/config/database.php credentials. Enable required PHP extensions (cURL, PDO, PDO MySQL, OpenSSL, JSON, MBString, FileInfo). Review server error logs in cPanel or hosting panel.
Problem: A gateway or proxy server received an invalid response from the upstream server.
CausePHP-FPM crash, overloaded server, or misconfigured reverse proxy (Nginx → Apache).
SolutionRestart PHP-FPM or the web server. Check hosting status. If you use Cloudflare or a CDN, verify origin server health.
Problem: The server is temporarily unable to handle the request.
CauseMaintenance mode, database downtime, or resource limits exceeded.
SolutionConfirm MySQL is online. Disable maintenance plugins. Upgrade hosting plan if traffic exceeds limits. Retry after a few minutes.
For the full checklist (doctor, Gradle, JDK, licenses, CocoaPods, signing), see Common Flutter SDK Build Errors above. Typical version-constraint messages include:
Best practices: use the Stable channel, keep Flutter updated, avoid mixing dependency sets from different Flutter releases, and read package compatibility notes before flutter pub upgrade.
Frequently asked questions about this package.
No. This application is only a media player and does not include IPTV channels, movies, series, or subscriptions.
No. Hosting, VPS, domains, and servers are not included.
Yes. The full source code is included and can be customized.
Yes. You can change the application name, package name, logo, colors, and publish it under your own brand.
Yes. The application is fully optimized for Android TV and Android Mobile.
Yes. Both M3U playlists and Xtream Codes API are fully supported.
Preview of the main application screens included in this package.
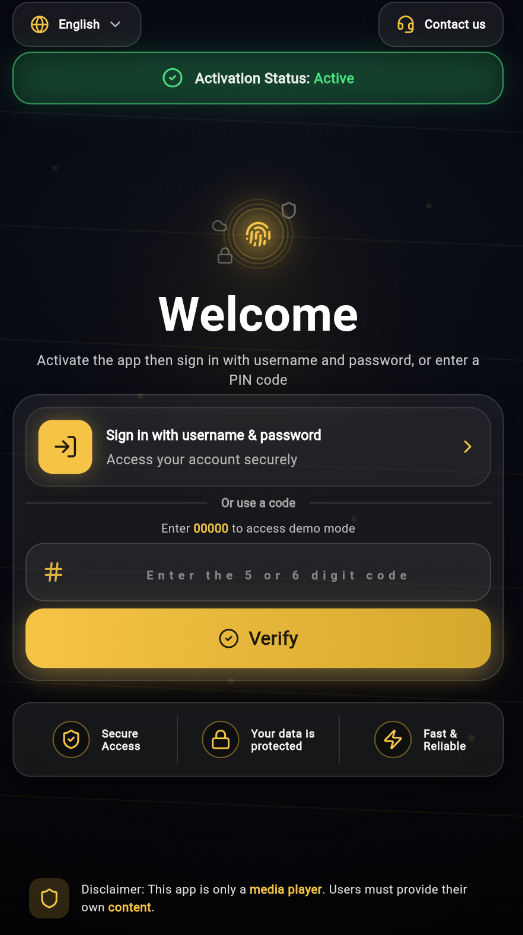
Secure login screen supporting Username/Password and Activation Code.
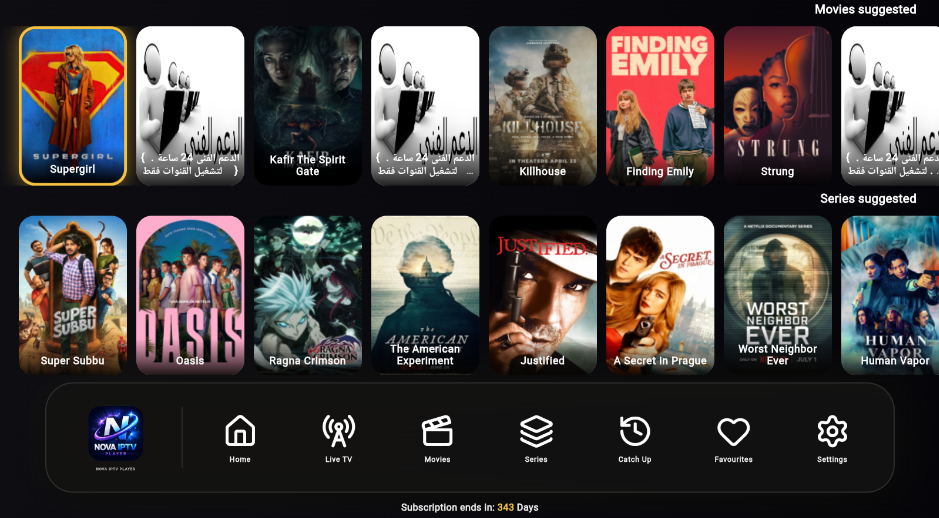
Modern IPTV home screen with Live TV, Movies and Series.
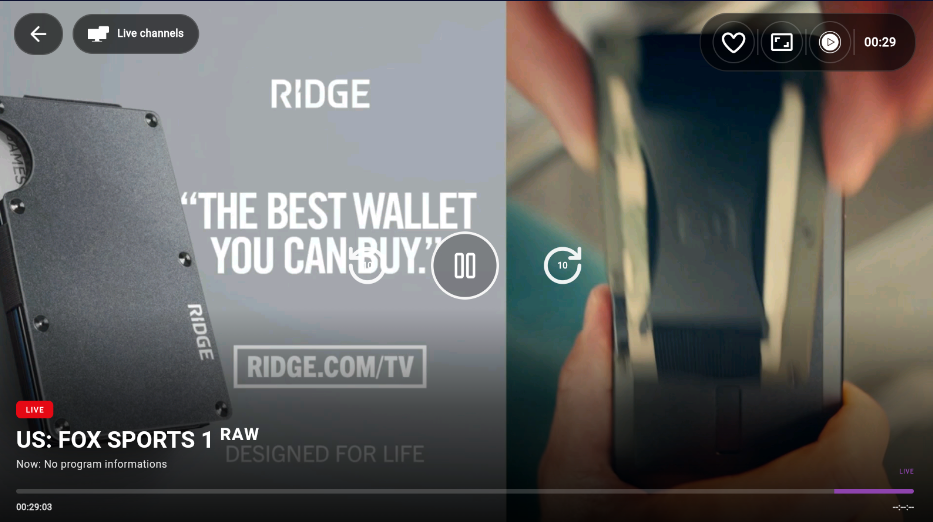
Professional video player with Better Player (ExoPlayer-based) & VLC Player support.
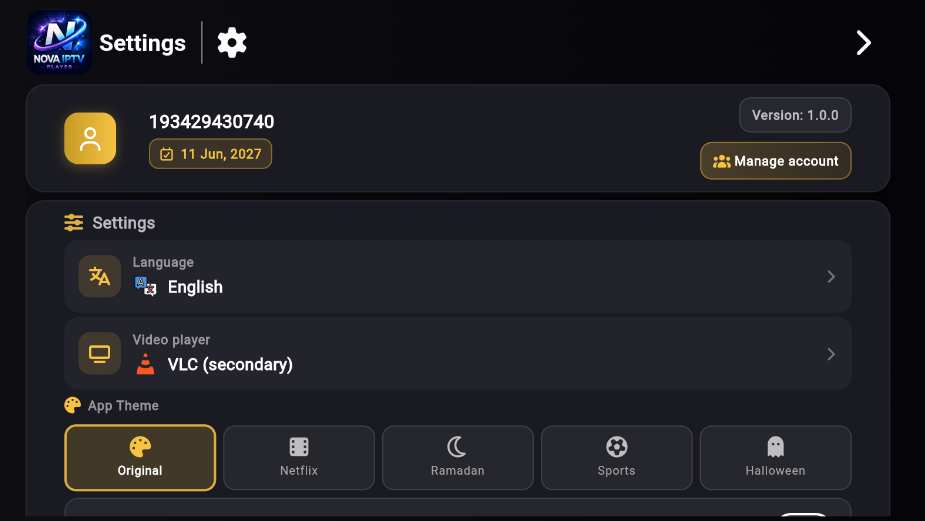
Application settings including language, theme, player selection and parental control.
How to create a release build for Android (APK / AAB) and iOS. Nova IPTV Player current release: v1.0.0 (version: 1.0.0+1 in pubspec.yaml).
In pubspec.yaml, set version: 1.0.0+1. The part before + is the user-facing version (1.0.0); the number after + is the build number (1). Increase both when you publish an update (for example, 1.0.1+2 for the next patch).
Google Play and production distribution require a signed release build. Debug signing is only for local testing. Follow every step below before uploading to a store.
A keystore is a secure file that stores your app’s signing key (certificate). Android uses it to prove that updates come from the same publisher. If you lose the keystore or its passwords, you cannot publish updates to the same Play Store listing — keep backups in a safe place.
Run this command from your project root (or any folder where you want to store the file). keytool ships with the JDK:
keytool -genkeypair -v \
-keystore upload-keystore.jks \
-keyalg RSA \
-keysize 2048 \
-validity 10000 \
-alias upload
You will be prompted for a keystore password, key password, and certificate details (name, organization, country). Remember these values — you need them in key.properties.
| Parameter | Meaning |
|---|---|
-genkeypair | Creates a new public/private key pair for signing. |
-v | Verbose output — shows what the tool is doing. |
-keystore upload-keystore.jks | Output file name. .jks is the Java Keystore format. |
-keyalg RSA | Encryption algorithm for the key (RSA is standard for Android). |
-keysize 2048 | Key strength in bits. 2048 is the recommended minimum. |
-validity 10000 | Certificate validity in days (~27 years). Must cover the app’s lifetime. |
-alias upload | Name of the key entry inside the keystore. Use upload for Play App Signing upload key. |
Move upload-keystore.jks into the android/ folder (same level as app/). Never commit this file to Git.
android/key.propertiesCreate a new file at android/key.properties (not inside app/). Add your credentials:
storePassword=YOUR_KEYSTORE_PASSWORD
keyPassword=YOUR_KEY_PASSWORD
keyAlias=upload
storeFile=upload-keystore.jks
storeFile is relative to the android/ folder. Add key.properties and *.jks to .gitignore so they are never uploaded to a repository.
signingConfigs in android/app/build.gradle.ktsThis project uses Kotlin DSL (build.gradle.kts). The file already loads key.properties when it exists. Confirm these sections are present:
val keystoreProperties = Properties()
val keystorePropertiesFile = rootProject.file("key.properties")
if (keystorePropertiesFile.exists()) {
    keystoreProperties.load(keystorePropertiesFile.inputStream())
}

android {
    signingConfigs {
        create("release") {
            if (keystoreProperties["storeFile"] != null) {
                storeFile = file(keystoreProperties["storeFile"] as String)
                storePassword = keystoreProperties["storePassword"] as String
                keyAlias = keystoreProperties["keyAlias"] as String
                keyPassword = keystoreProperties["keyPassword"] as String
            }
        }
    }
    buildTypes {
        release {
            signingConfig = if (keystorePropertiesFile.exists()) {
                signingConfigs.getByName("release")
            } else {
                signingConfigs.getByName("debug")  // local testing only
            }
        }
    }
}
If you use Groovy (build.gradle), the same logic applies: load properties before android { }, define signingConfigs.release, and set buildTypes.release.signingConfig signingConfigs.release.
When key.properties exists, Flutter’s release build is signed with your production key. Without it, the project falls back to debug signing — acceptable for testing on your own device, but not accepted by Google Play for production uploads.
After configuring signing, always run flutter clean before the first signed release build.
An APK can be installed directly on devices (sideloading, testers, or stores that accept APK).
flutter clean
flutter pub get
flutter build apk --release
Output: build/app/outputs/flutter-apk/app-release.apk
Verify signing before distribution:
keytool -printcert -jarfile build/app/outputs/flutter-apk/app-release.apkAn AAB (Android App Bundle) is the required format for Google Play. Google generates optimized APKs per device from your bundle.
flutter build appbundle --releaseOutput: build/app/outputs/bundle/release/app-release.aab — upload this file in Google Play Console.
| Format | Use when |
|---|---|
| AAB | Publishing or updating on Google Play (required for new apps). |
| APK | Direct install on test devices, third-party stores that require APK, or internal QA sideloading. |
For Play Store production, always prefer AAB. Keep your keystore backed up — you need the same key for all future updates.
Requirements: a Mac, an active Apple Developer Account (paid membership), and Xcode. Follow these steps in order.
Enroll at developer.apple.com/programs. You need this to create certificates, register an App ID, and submit to the App Store. Sign in with the same Apple ID in Xcode (Xcode → Settings → Accounts).
A certificate proves you are an authorized Apple developer. For App Store distribution you need an Apple Distribution certificate. With automatic signing enabled, Xcode creates and manages certificates for you. You can also create them manually in the Apple Developer portal under Certificates, Identifiers & Profiles.
An App ID uniquely identifies your app on Apple’s systems. It must match your Bundle Identifier (for example, com.mybrand.iptv). Register it in the Developer portal or let Xcode create it when you enable automatic signing.
In Xcode, select the Runner target → General → set Bundle Identifier to your unique ID. It must match the value you set in Change Package Name (default in source: nova.iptv.player). Each published app needs a globally unique bundle ID.
A provisioning profile links your App ID, distribution certificate, and (for development) allowed test devices. For App Store release you need an App Store distribution profile. Xcode downloads and installs the correct profile when automatic signing is on.
Open ios/Runner.xcworkspace → Runner target → Signing & Capabilities → enable Automatically manage signing → choose your Team. Xcode handles certificates and profiles. Confirm there are no red signing errors before archiving.
Disable automatic signing and select a specific Provisioning Profile and Signing Certificate manually. Use this only if your organization requires fixed profiles or CI/CD with exported certificates. Most buyers should use automatic signing.
Select a real device or Any iOS Device (arm64) as the build destination (not a simulator). Menu: Product → Archive. Wait until Xcode finishes — this creates a release build stored in the Organizer.
In the Organizer window, select your archive → Validate App. Xcode checks signing, entitlements, and common App Store issues before upload. Fix any errors shown, then archive again if needed.
Still in Organizer: Distribute App → App Store Connect → follow the wizard. After upload, open App Store Connect, select your app, attach the build, complete metadata (description, screenshots, privacy), and submit for review.
Info.plist or Flutter iOS config. Keep them identical..xcodeproj instead of .xcworkspace — Always open Runner.xcworkspace after pod install.Alternative (command line): After signing is configured, run flutter build ipa from the project root — output is in build/ios/ipa/.
| Goal | Command |
|---|---|
| Clean + build signed APK | flutter clean && flutter pub get && flutter build apk --release |
| Build signed AAB | flutter build appbundle --release |
| Build iOS IPA | flutter build ipa or Xcode: Product → Archive |
minifyEnabled and shrinkResources are already enabled in android/app/build.gradle.kts for release builds.